Hello, fellow yarn lovers! Get ready to dive into the cozy magic of autumn with this delightful Crochet Pumpkin Hat pattern. Imagine the sweetest little pumpkin, complete with a curly stem and a perfectly round shape, ready to adorn the heads of everyone you love!
This hat is an absolute dream for crafters of all levels, especially beginners. Its simple stitches and clear instructions make it a joy to create. Whether you’re looking for adorable photo props for your little ones, a thoughtful handmade gift for a fall birthday, or even a whimsical touch of seasonal decor, this pumpkin hat is sure to be a hit. We’ll guide you through each step, from casting on to finishing that adorable little stem, ensuring you have a beautifully crafted pumpkin hat in no time. Let’s get hooking!

Craft Your Cozy Companions: The All-Sizes Crochet Pumpkin Hat Pattern
There’s something undeniably magical about autumn. The crisp air, the vibrant foliage, and the irresistible urge to snuggle up in something warm and wonderfully handmade. And what better way to embrace the season than by crocheting adorable pumpkin hats for everyone, from your tiniest little pumpkin to yourself? This versatile pattern is designed to be inclusive, offering clear instructions for creating a perfect fit for any head size. So grab your hook and your favorite autumnal yarn, because we’re about to embark on a crafting adventure that will fill your home with festive cheer and cozy warmth!
Yarn and Hook Recommendations: The Foundation of Your Pumpkin
The beauty of this crochet pumpkin hat pattern lies in its adaptability, and that starts with your yarn and hook choice. For that quintessential pumpkin texture and warmth, we recommend using worsted weight yarn. This weight strikes a wonderful balance between being substantial enough for a cozy hat and not so bulky that it becomes cumbersome to work with.
Yarn Choices:
Acrylic Yarn: This is a fantastic choice for beginners and for hats that will be worn frequently. Acrylic is durable, machine washable, and comes in an incredible array of colors. Look for brands known for their softness and stitch definition. For our pumpkin hats, we’ll be focusing on classic pumpkin shades like bright orange, warm beige, and deep brown for the stem. But don’t be afraid to get creative! Think creamy white for a ghost pumpkin, deep purple for a Halloween vibe, or even variegated yarns for a unique, multi-tonal effect.
Wool or Wool Blends: For ultimate warmth and a luxurious feel, consider wool or wool blends. These yarns offer excellent insulation and a beautiful drape. Just be mindful of washing instructions if using pure wool, as some can be delicate.
Cotton Blends: A cotton blend can offer breathability while still providing good structure. This might be a good option for slightly milder climates or for babies who might overheat.
Hook Size:
The hook size will depend on your yarn choice and your personal crocheting tension. As a general guideline, for worsted weight yarn, a 4.5mm (G/6) to 5.5mm (I/9) hook is usually a good starting point.
Tip for Beginners: It’s always a good idea to make a gauge swatch before you begin. Crochet a small square (about 4×4 inches) using your chosen yarn and hook. Measure how many stitches and rows fit within that square. This will ensure your hat turns out the correct size. If you have more stitches than the pattern calls for, try a larger hook. If you have fewer, try a smaller hook.
Mastering the Stitches: Your Crochet Toolkit
This pumpkin hat pattern is designed to be beginner-friendly, utilizing fundamental crochet stitches that are easy to learn and create beautiful results.
Key Stitches You’ll Encounter:
Magic Ring (or Magic Circle): This is the secret to creating a seamless, tight starting circle, perfect for the crown of your hat. Don’t be intimidated by it! Many excellent video tutorials are available online that break down this technique step-by-step.
Single Crochet (sc): The most basic crochet stitch, it forms a dense and sturdy fabric, ideal for hats.
Half Double Crochet (hdc): A slightly taller stitch than single crochet, it creates a lovely textured fabric and works up a bit faster. This is often the primary stitch used for the body of the hat to achieve that characteristic pumpkin shape.
Slip Stitch (sl st): Used to join rounds and create neat finishing.
Increase (inc): This is crucial for shaping your hat. For single crochet, an increase typically means working two single crochet stitches into the same stitch. For half double crochet, you’ll work two half double crochets into the same stitch.
Tip for Beginners: If you’re new to crochet, familiarize yourself with these stitches before you begin. Practice them on a swatch until you feel comfortable with the tension and consistency. There are countless free tutorials on YouTube that can guide you through each stitch.
Tips for Beginners: Nurturing Your Crafting Journey
Embarking on a crochet project, especially one with multiple sizes, can feel like a big undertaking. But with a few helpful tips, even a beginner can create a stunning pumpkin hat.
Read the Pattern Thoroughly: Before you even pick up your hook, read the entire pattern from beginning to end. This will give you a good overview of the steps involved and help you identify any potentially confusing sections.
Use a Stitch Marker: These little wonders are your best friends! Place a stitch marker in the first stitch of each round. This will prevent you from losing your place and ensure your rounds are counted accurately, especially when working in a spiral.
Don’t Be Afraid to Undo: Everyone makes mistakes! If you realize you’ve made an error, don’t panic. Carefully pull out your stitches (this is called “frogging” – as in, “rip-it, rip-it!”) and try again. It’s a natural part of the learning process.
Keep Your Tension Consistent: Try to maintain a similar tension throughout your work. This will ensure your stitches are even and your hat has a smooth, professional appearance. Practice will help you achieve this.
Block Your Finished Hat: Blocking is a finishing technique that involves wetting or steaming your finished crochet piece and pinning it to shape. This helps to even out stitches, open up the fabric, and ensure your hat has the correct dimensions. For acrylic yarns, a gentle steam or a cool water soak and air dry will work wonders.
Customization Corner: Making Your Pumpkin Uniquely Yours
The true joy of this pattern lies in its potential for personalization. Here’s how you can make your crochet pumpkin hats truly one-of-a-kind.
Size Matters:
The beauty of this pattern is its built-in sizing flexibility. The instructions will guide you through increasing the circumference of the hat until you reach the desired size. You’ll typically measure the circumference of the intended wearer’s head and crochet until the flat circle of your hat matches that measurement (remembering that the crochet fabric will stretch slightly). The pattern will provide stitch counts and measurements for various common sizes, from preemie to adult XL.
Color Play:
While the classic orange is undeniably charming, don’t limit yourself!
Stripes: Alternate between different autumnal colors for a fun striped effect.
Ombre: Use several shades of the same color, gradually transitioning from light to dark, to create a beautiful ombre look.
Contrasting Stems: Experiment with different colored yarns for the stem. A dark brown, a deep green, or even a bright yellow can create a unique contrast.
Accents: Add embroidered details like sleepy eyes, little stitched smiles, or even tiny crochet ladybugs for a whimsical touch.
Adding Embellishments:
Crocheted Leaves: Create a small crocheted leaf in green or brown yarn and stitch it to the side of the hat for an extra autumnal touch.
Buttons: Sew on cute buttons to the stem for added dimension.
Ribbon Ties: Add ribbons to the sides for cute ties, especially for baby hats.
Caring for Your Cozy Creation: Keeping Your Pumpkin Fresh
To ensure your handmade pumpkin hats last for many seasons of cozy wear, proper care is essential.
Washing: For acrylic yarns, most finished hats can be machine washed on a gentle cycle with cool water and a mild detergent. It’s best to place them in a mesh laundry bag to prevent snagging.
Drying: Never put your crocheted items in the dryer! The heat can cause acrylic yarns to melt or become misshapen. Instead, gently squeeze out excess water (don’t wring) and lay the hat flat on a clean towel to air dry. Reshape it while it’s damp to maintain its form.
Wool Care: If you’ve used wool yarn, follow the specific washing instructions for that yarn. This often involves hand washing with cool water and a wool-specific detergent, followed by gentle squeezing and flat drying.
Project Ideas: Beyond the Basic Hat
This versatile pumpkin pattern can inspire a whole host of delightful projects.
Matching Family Sets: Create hats for everyone in the family, from the littlest babe to the grown-ups! Imagine a family photo session with everyone sporting their handmade pumpkin hats.
Baby Shower Gifts: A set of adorable baby-sized pumpkin hats makes for a thoughtful and unique baby shower gift.
Halloween Costumes: These hats are perfect for a quick and cute Halloween costume. Pair an orange hat with a brown outfit for an instant pumpkin look!
Decorations: Larger versions of the hat, or even just the pumpkin portion, can be used as decorative accents around your home during the fall season. Stuff them with a bit of batting to give them a more rounded shape.
Pet Accessories: If you have a dog or cat who enjoys wearing accessories, a small pumpkin hat can be a charming addition to their fall wardrobe (always supervise pets when they are wearing accessories).
With this crochet pumpkin hat pattern, you’re not just creating a hat; you’re crafting a piece of wearable art, a symbol of cozy autumn days, and a tangible expression of your love for handmade. Happy crocheting, and may your crafting season be filled with warmth, joy, and plenty of perfectly plump pumpkins!
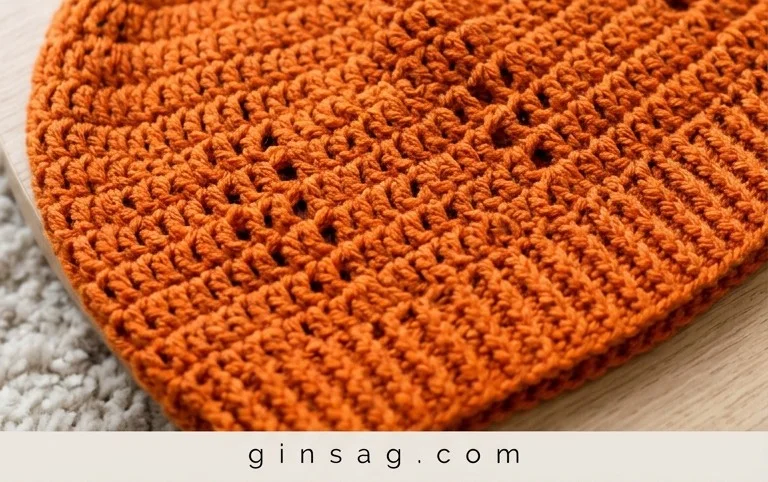
And there you have it! Your very own adorable crochet pumpkin hat, ready to spread some autumnal cheer. We hope you’ve enjoyed this pattern and found it a delightful project to create. Don’t hesitate to grab your yarn and hook – this cozy hat is waiting for you!
We’d absolutely love to see your finished creations! Share your marvelous pumpkin hats on social media using # so we can all admire your handiwork. Feel free to get creative with color combinations or add embellishments like a cute little stem or some crocheted leaves. And if you’ve fallen in love with the hook and yarn, be sure to explore our other fun and festive patterns for your next cozy adventure!