Hey there, fellow yarn lovers! Are you ready to dive into a crochet project that’s as delightfully quirky as it is adorable? Get ready to meet your new favorite amigurumi creation: the Two-Headed Crochet Bunny! This isn’t just any bunny; imagine a charming, plump little friend with two sweet heads, ready to charm their way into your heart.
What makes this pattern so special? It’s all about embracing your creative spirit! Whether you lean towards a spooky, gothic vibe with deep purples and blacks, or a sugary-sweet, kawaii dream with pastels and bright pops, the color choices are entirely yours. This project is perfect for crocheters of all levels, especially those dipping their toes into amigurumi for the first time. It also makes for an utterly unique handmade gift or a whimsical addition to your home decor. Join us as we explore simple stitches, clever shaping, and how to bring these two adorable heads to life!
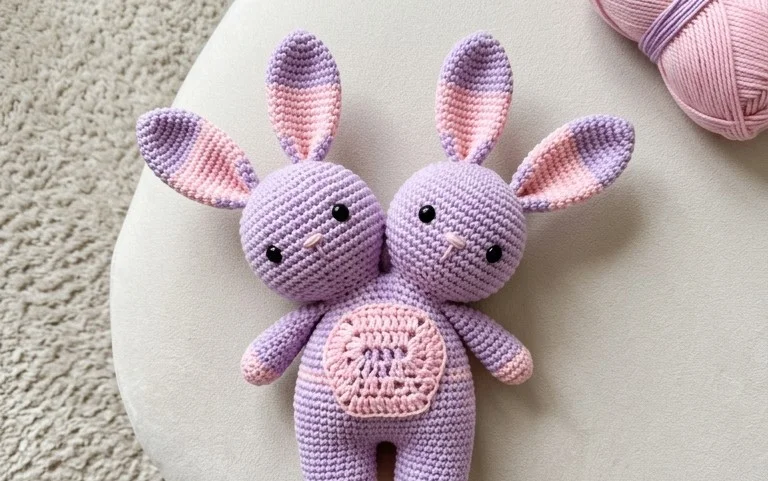
Creepy or Kawaii? This Two-Headed Crochet Bunny Amigurumi Is All About the Colors You Choose
There’s something undeniably captivating about amigurumi, the Japanese art of crocheting small stuffed yarn creatures. And when you inject a touch of the unexpected, like a delightful two-headed bunny, you’ve got a project that’s sure to turn heads and spark joy. This pattern offers a unique twist on the classic bunny, allowing you to swing wildly from adorable and pastel to spookily charming with just a change in your yarn palette. Let’s dive into how to create your very own two-headed amigurumi bunny, exploring yarn choices, stitch techniques, customization options, and more!
Yarn & Hook Recommendations: Setting the Foundation for Your Bunny
The yarn you choose will be the single biggest factor in determining whether your bunny leans towards the “creepy” or “kawaii” end of the spectrum. For that classic, cuddly feel, opt for soft, smooth yarns.
Yarn Type: Worsted weight cotton or acrylic yarns are excellent choices. Cotton offers a lovely matte finish and good stitch definition, perfect for crisp details. Acrylic is often more budget-friendly, widely available, and can be very soft and durable. For a more luxurious feel, consider a merino wool blend.
Color Choices (The Crucial Part!):
Kawaii Palette: Think pastel pinks, baby blues, mint greens, sunny yellows, and soft lavenders for the main bunny body. For the heads, you could contrast with a creamy white or a pale peach. Sweet little embroidered eyes in black or dark brown complete the cute aesthetic.
Creepy Palette: This is where you can have some serious fun! Deep burgundies, forest greens, midnight blues, charcoal greys, and even black can create a wonderfully gothic or spooky vibe. For the heads, consider contrasting with a bone white or a sickly pale green. Embroider eyes in vibrant red, neon green, or even black with a tiny white pupil to give them a haunting gaze.
Hook Size: For worsted weight yarn, a hook size between 3.0mm (US D/3) and 4.0mm (US G/6) is typically recommended. The exact size will depend on your personal tension and the specific yarn you’re using. Aim for a hook that creates tight stitches, preventing the stuffing from showing through. It’s always a good idea to test your tension on a small swatch before starting.
Essential Stitch Techniques: Building Your Bunny, Stitch by Stitch
This pattern primarily relies on a few fundamental amigurumi techniques that are accessible to crocheters of all levels.
Magic Ring (or Adjustable Loop): This is the cornerstone of amigurumi, creating a tight, seamless starting point for all your circular pieces (heads, body, ears, etc.).
Single Crochet (sc): The workhorse of amigurumi. Consistent tension here is key for a smooth, even fabric.
Increase (inc): Typically worked by crocheting two single crochets into the same stitch. This is used to gradually widen your crochet pieces.
Decrease (dec): Usually worked by crocheting two stitches together. In amigurumi, the invisible decrease (skipping a stitch and crocheting through the front loops of two stitches) is preferred as it’s less noticeable.
Slip Stitch (sl st): Used for joining rounds and creating a neat finish.
Crocheting in Rounds: All the main pieces of the bunny will be worked in continuous rounds, meaning you won’t be joining with a slip stitch and chaining at the beginning of each round unless instructed otherwise. A stitch marker is your best friend here to keep track of the start of each round.
Embroidering Details: Eyes, nose, and mouth are typically embroidered onto the finished pieces using a yarn needle and contrasting yarn. This is where you can really bring your bunny to life (or make it delightfully eerie!).
Tips for Beginners: Navigating Your First Two-Headed Creation
Don’t be intimidated by the “two-headed” aspect! Each head is worked identically, and the body is straightforward.
Start Simple: If you’re brand new to amigurumi, consider making a single-headed bunny first to get a feel for the techniques. However, this pattern is designed to be achievable for determined beginners.
Master the Magic Ring: Practice this technique until you’re comfortable. There are many excellent video tutorials available online that can guide you.
Use a Stitch Marker: I cannot stress this enough! A stitch marker will prevent you from losing your place in the rounds, which is crucial for consistent shaping.
Stuffing is Key: Don’t overstuff, which can stretch your stitches and reveal the stuffing. Stuff firmly but evenly as you crochet. Use polyester fiberfill.
Read Ahead: Before you start crocheting a new section, read through the instructions for that section completely. This will help you anticipate the next steps.
Patience is a Virtue: Amigurumi can be a bit fiddly, especially when working small pieces. Take your time, and don’t be afraid to frog (undo) your work if something doesn’t look right. It’s all part of the learning process!
How to Customize: Making Your Bunny Uniquely Yours
This pattern is a fantastic canvas for your creativity. Beyond the color choices, there are other ways to personalize your two-headed bunny.
Sizing:
Larger Bunny: Use a thicker yarn (e.g., bulky weight) and a correspondingly larger hook. Be aware that this will also increase the overall stitch count and likely the number of rounds for each piece to maintain proportional shapes.
Smaller Bunny: Use a thinner yarn (e.g., sport weight or DK) and a smaller hook. Again, this will affect stitch counts and round numbers.
Adding Accessories:
Kawaii Touches: Crochet a tiny bow, a little flower, or a miniature hat to adorn your bunny.
Creepy Touches: Crochet a tiny cobweb, a miniature skull, or a tattered scarf. You could even add some black or red embroidery floss to create “scars” or stitches on the heads.
Eye Options:
Safety Eyes: For a durable and professional look, consider using safety eyes. Ensure they are appropriate for the size of your amigurumi.
Embroidered Eyes: As mentioned, embroidery offers a lot of flexibility in terms of color and expression. You can create round pupils, slit pupils, or even slightly squinted eyes for a unique character.
Button Eyes: For a vintage or more “stitched” look, small buttons can be securely sewn on.
Ear Shape: Experiment with the number of rounds or the shaping of the ears. You can make them longer, shorter, floppier, or pointier.
Care Instructions for Your Finished Piece
Your crocheted bunny deserves a little TLC to keep it looking its best.
Spot Clean: For minor spills or dirt, gently spot clean with a damp cloth and mild soap. Dab the area gently and avoid rubbing, which can damage the yarn.
Hand Wash (if necessary): If a more thorough cleaning is needed, hand wash your amigurumi in cool water with a small amount of mild detergent. Gently squeeze out excess water without wringing.
Air Dry: Reshape your bunny and lay it flat on a towel to air dry. Avoid direct sunlight or heat, which can cause colors to fade or yarn to become brittle. Do not put it in the dryer!
Fluff Up: Once dry, you can gently fluff up any matted areas with your fingers.
Project Ideas: Beyond Just a Bunny
This two-headed bunny pattern is wonderfully versatile, opening up a world of creative possibilities.
Halloween Decor: Embrace the “creepy” side! Make a whole family of spooky bunnies to decorate your home for Halloween. Their unusual form makes them a perfect conversation starter.
Kawaii Companions: Create a collection of pastel bunnies for a child’s nursery or as a sweet gift. Their unique shape makes them stand out from the typical amigurumi.
Themed Parties: Imagine these bunnies as part of a whimsical, slightly quirky party decor for birthdays or other celebrations.
Unique Gifts: This is not your average handmade gift! The ability to customize colors and themes makes it a thoughtful and memorable present for anyone who appreciates a touch of the unusual.
Amigurumi Collections: If you’re an amigurumi enthusiast, this pattern adds a truly unique piece to your growing collection, showcasing your skills and creativity.
So, gather your yarn, pick up your hook, and get ready to bring this fascinating two-headed bunny to life. Will yours be a cuddly companion or a delightfully eerie friend? The choice, and the magic, are entirely in your hands!
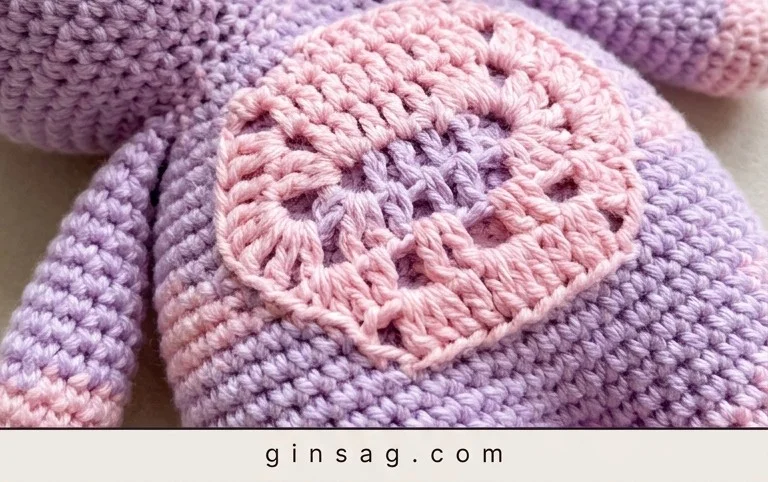
There you have it – your very own two-headed crochet bunny! Whether you’ve embraced the spookier side with deep, mysterious hues or opted for a pastel explosion of cuteness, the most important part is that you brought this unique amigurumi to life. We can’t wait to see your delightful creations! Tag us on social media with your finished bunnies, and let’s spread the joy of this wonderfully weird pattern.
Don’t be afraid to experiment with even more color combinations, perhaps adding contrasting stitches or tiny accessories to make your bunny truly one-of-a-kind. And if you’ve fallen in love with the process, be sure to explore the rest of our crochet pattern collection for more adventures in yarn!